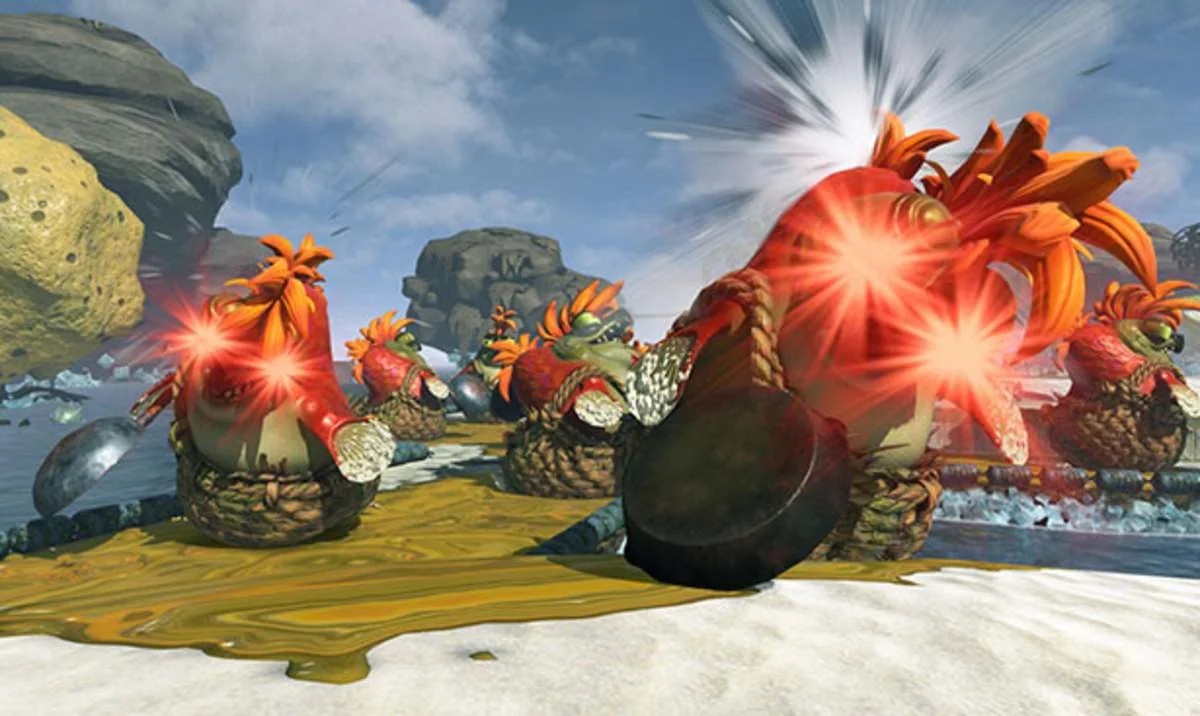
Splatoon Raiders enemies and bosses at a glance
The Splatoon Raiders Salmonid enemies fall into three practical groups: numerous Lesser Salmonids, specialized Boss Salmonids and stronger Seasoned Salmonids encountered as the expedition gets more demanding. That distinction matters more than physical size. A Lesser enemy is usually a space-and-attention problem, a Boss is a small combat puzzle with a particular counter, and a Seasoned enemy is an upgraded threat that punishes a lazy version of that counter.
This guide is arranged like a field manual, not a lore catalogue. Identify what an enemy is doing to the arena, remove the threat that restricts movement or attacks from range, and only then clear the bodies directly in front of the Mechanic. That order prevents a common failure spiral: shooting the toughest target on screen while ink, missiles and smaller attackers quietly close every escape route.
Nintendo's official description says Lesser Salmonids attack in swarms, while Boss species bring distinct challenges and Seasoned Salmonids can appear when players dig deeper. In practice, a Boss is not necessarily a chapter-ending battle. It is an elite enemy type that can join an ordinary mission encounter. Defeating Lesser Salmonids supplies Power Eggs, while Boss victories can award a much more valuable Mega Power Egg. The exact reward is useful, but surviving with the loot is still more important than chasing one drop through a dangerous crowd.
Use the lists below as a decision tool. The counter column answers what to shoot or interrupt; the priority advice answers whether to do it now. Recommendations assume the current launch version on Nintendo Switch 2 and deliberately avoid the plot's final confrontations. Players who want the basic movement and upgrade loop first can begin with our beginner guide, while the site's wiki hub is the better place for character and location reference.
How Salmonid threat roles and weak points work
Read an encounter in layers. First identify reach: a Stinger, Flyfish or another distant attacker can damage you while you are dealing with the foreground. Next check terrain control: enemy ink, a body blocking a corridor or an attack marker underfoot can remove the safe lane you planned to use. Last comes contact pressure, the Lesser Salmonids already close enough to interrupt aiming. Clearing two nearby Chums may be correct even when a Boss is the nominal priority, because a counter that cannot be executed safely is not a counter at all.
Weak points are enemy-specific. Some armored targets ask you to wait for an attack window, some require circling to a vulnerable pilot, and others are dismantled piece by piece. Do not empty an ink tank into metal just because the damage number is large elsewhere in your build. Watch one attack cycle, preserve ink, then commit when the actual target appears. Raiders changes some familiar Salmon Run interactions around its Gadget system, so visual feedback in this game outranks muscle memory from Splatoon 3.
A useful default priority is: sustained long-range attacker, enemy closing the escape lane, objective-disrupting Boss, then the nearest crowd. It is a starting rule, not a rigid ranking. A nearly defeated Boss can jump to the front because finishing it immediately removes an attack and releases its Mega Power Egg. Conversely, a fresh armored Boss at the edge of the arena can wait if four Lesser enemies are about to pin you against a wall.
Finally, a defeat and a pickup are separate actions. Plan a route to the reward before landing the final shots, especially during timed dens. Do not dive through hostile ink for a Mega Power Egg with no return lane. Pre-ink connected paths, collect during the brief lull after the Boss falls, and use Bot Buddy or a collection-focused part when the build offers one. The best enemy knowledge preserves both the run and the materials that improve the next one.
Regular and elite Salmonid priority list
The Lesser roster includes Chum, Tong Chum, Spring Chum, Smallfry, Cohock, Tong Cohock, Bomb Cohock, Spinook and Sparky. “Lesser” describes the class, not permission to ignore it. These enemies win by multiplying interruptions: one body stops the swim line, another forces a dodge, and the next lands a hit while the camera is pointed at a Boss.
| Battlefield job | Enemies to watch | Default response | Priority |
|---|---|---|---|
| Fast contact pressure | Smallfry, Chum | Use short bursts or a compact area effect before they surround the aiming position. | High when close |
| Heavy body blocker | Cohock | Create room, shoot while backing into friendly ink, and avoid trading damage in a narrow lane. | High in corridors |
| Extended or surprise reach | Tong Chum, Tong Cohock, Spring Chum | Respect the extra attack space; sidestep first and punish recovery instead of assuming normal Chum range. | Medium to high |
| Payload pressure | Bomb Cohock, Sparky | Read the warning and move before committing to damage; remove them when their attack overlaps the objective. | High during a telegraph |
| Ink control | Spinook | Shoot the slow airborne support unit early, then repaint the route rather than fighting in its coverage. | High if left active |
The table is deliberately situational. Smallfry at the far edge is less urgent than a Spinook inking your only climb, while a Cohock in open ground can be kited more safely than the same enemy inside a ruin. If the crowd is mixed, remove low-health attackers with controlled sweeps rather than tracking one target far from the objective. Preserve a burst for whatever approaches from outside the camera.
New Raiders variants matter because their silhouette resembles a familiar base enemy while their reach or movement does not. Give an unfamiliar Chum or Cohock one clean attack cycle at medium distance. That tiny observation cost is cheaper than discovering the variation while trapped. Once its timing is clear, treat it by role: dodge a telegraphed payload, deny an ink-support unit, or maintain distance from the heavy blocker. This role-first method also scales when higher Salmonid Levels combine several variants in one arena.
Boss Salmonids: counters and weak points
Boss Salmonids are repeatable elite encounters, each built around a readable action. The safest counter is rarely “stand still and deal maximum damage.” Trigger or wait for the action, move out of its result, then attack the part that has become vulnerable. Here is the quick Raiders reference:
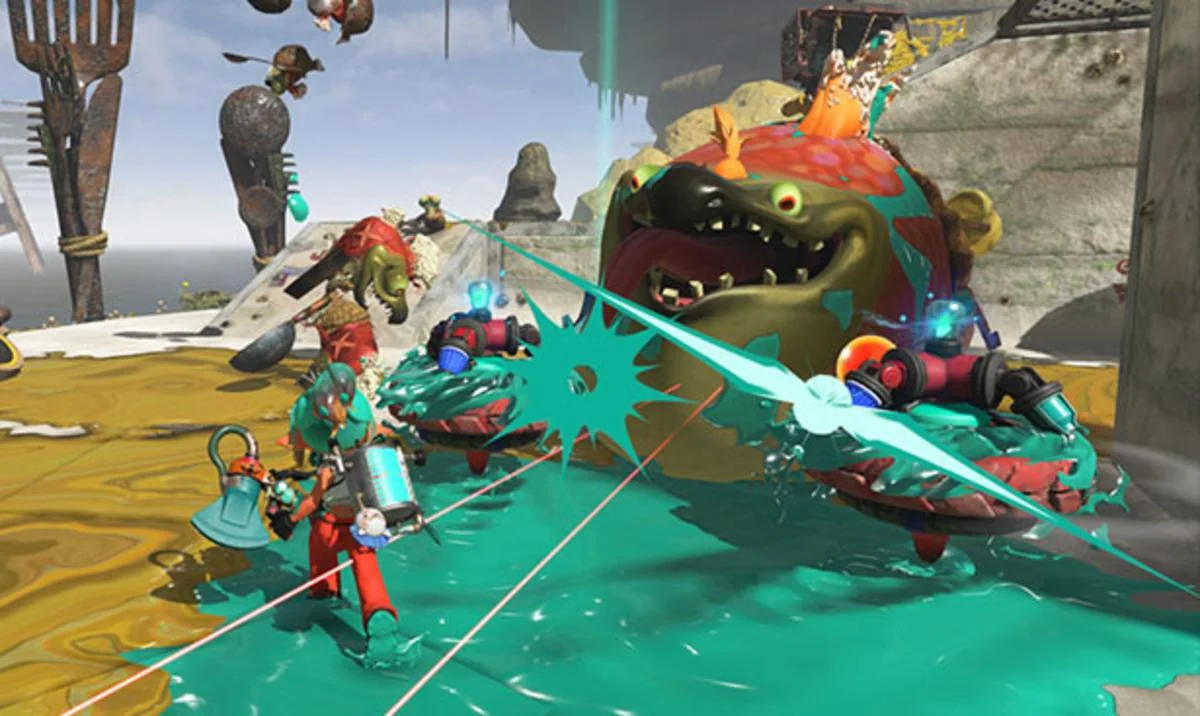
| Boss | Counter in Splatoon Raiders |
|---|---|
| Steelhead | Hold fire for the head attack to charge, then focus the swelling weak area; keep distance from the defeat blast. |
| Steel Eel | Lead its long ink wall into open space, circle behind it and shoot the exposed pilot at the tail. |
| Scrapper | Pressure the front to stop it, then move around and damage the driver; never disable it where the body seals a narrow route. |
| Stinger | Reach it without crossing the beam and knock out the stacked sections from a stable angle. |
| Maws | Leave the marked bite zone, then punish the vulnerable recovery. Raiders also allows a standard-fire solution rather than requiring a carried bomb. |
| Drizzler | Reposition out of the rain line and attack when the umbrella is open or a clear shot exists; do not let repeated clouds erase the arena. |
| Flyfish | Aim at the pilot from the front or rear. Its shoulder launchers resist attacks, so the old basket-first habit is the wrong Raiders plan. |
| Fish Stick | Shoot the propeller to shorten the structure, then clear the circling fish before their ink dominates the floor. |
| Flipper-Flopper | Ink the marked landing zone where practical, step outside before the dive and attack during the failed or completed landing recovery. |
| Slammin' Lid | Enter its field to bait the crash, evade, climb onto the craft and attack the pilot; the slam can also crush nearby Salmonids. |
| Big Shot | Jump or move through its shockwave timing, close the distance safely and commit damage before another ranged cycle stacks up. |
| Salty Tongue | Watch the neck extension, dodge left or right before the immediate high-damage bite, then fire during recovery. |
| Salivator | Move clear of the thrown drool bag's whirlwind zone, approach from a safe angle and punish between throws. |
| Smoker | Eliminate it early: the unit is fragile, but its smoke hardens nearby Salmonids and makes every other target slower to remove. |
| Goldie | Chase and concentrate fire only when the route is safe. It flees rather than attacking and rewards Spirhalite Shards. |
When two Bosses overlap, remove the one that prevents you from executing the other's counter. A Smoker protecting a Steel Eel is the first target; a Stinger firing across a Slammin' Lid's field may be worth a detour. If an attack is already in progress, dodge before switching targets. One disciplined cycle normally costs less time than recovering from a splat.
Seasoned Salmonids and new Raiders variants
Seasoned Salmonids are not a separate story-boss category. They are larger, salt-encrusted upgrades of Boss Salmonids, with more durability and more dangerous versions of familiar attacks. The released roster is Thick-Cut Salty Tongue, Minced Scrapper, Big-Stack Stinger, Jumbo Big Shot, Refill Steelhead, Big-Haul Maws, Long-Line Steel Eel, Extra-Crispy Flyfish and Strong-Arms. Heavy salt and crystal-like growths are the visual warning that the base counter is about to demand more room, patience or damage.
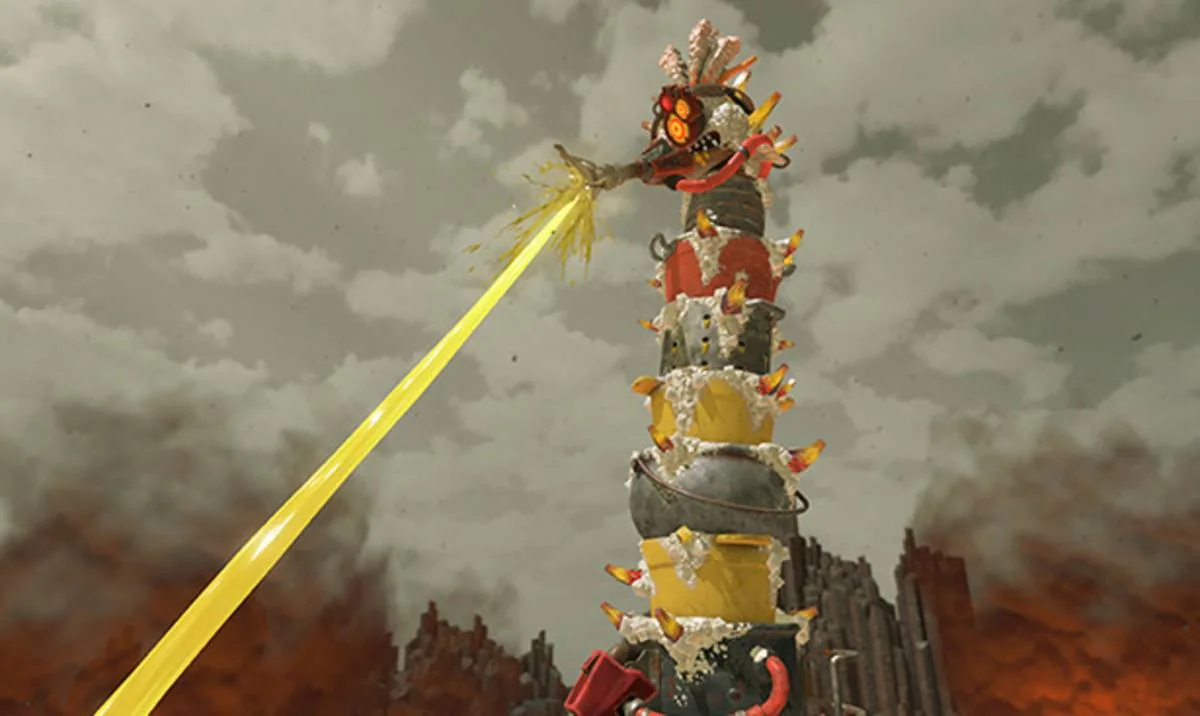
Start with recognition, but do not finish with autopilot. Thick-Cut Salty Tongue replaces the ordinary post-extension bite with a thick sonic beam fired in a straight line. The answer remains lateral movement, yet the longer line makes early movement and a clear side lane much more important. Minced Scrapper turns the already awkward frontal approach into a much larger roller problem: lure it away from walls, refuse a head-on damage race and preserve access to its vulnerable side or rear. Big-Stack Stinger and Jumbo Big Shot amplify ranged pressure, so they become urgent when their attacks overlap an objective or another Boss's recovery window.
The remaining names tell you which base lesson to carry forward. Refill Steelhead still rewards reading its charge; Big-Haul Maws still asks you to escape the bite zone; Long-Line Steel Eel still makes rear access and pathing central; Extra-Crispy Flyfish remains a ranged pilot problem. Strong-Arms should be treated as a heavy close-range space check: keep an open lane and do not let lesser bodies hold you inside its attack area. The specific animation is the final authority—observe the first cycle instead of guessing the exact radius from the normal form.
Against any Seasoned enemy, clear support threats before a long damage commitment. A Smoker buff or a Spinook-covered floor turns a manageable endurance fight into an attrition trap. Save a Gadget charge for the verified opening rather than spending every cooldown on approach, and use a Showstopper when it will remove overlapping pressure, not merely decorate an already safe damage window. Seasoned enemies can yield multiple Mega Power Eggs, but the bigger reward is never a reason to collect through an active beam, shockwave or bite marker.
Best weapons, Gadgets and Tank roles by enemy type
No Tank automatically counters every Salmonid. Match the loadout to the encounter's hardest job. Speed Tank is the cleanest answer when survival depends on crossing a beam, reaching a rear pilot or escaping a crowded bite zone. Pair mobility with a weapon that can capitalize immediately after the reposition; excessive travel is wasted if the target's opening closes before damage begins.
Power Tank suits health-heavy Boss and Seasoned targets when their openings are obvious but short. Favor reliable burst and an area tool that prevents Lesser enemies from cancelling that burst. Tactical Tank is strongest when an arena asks you to control multiple directions: a Shot Pot can keep firing, Bombloons can prepare an explosive zone, and Tether Wail provides focused reach. Deployables belong beside the fight or along a retreat path, not behind a wall the enemy will never cross.
| Enemy problem | Weapon property | Gadget job | Tank lean |
|---|---|---|---|
| Small, dense swarm | Wide coverage or quick handling | Persistent area damage and knockback | Power or Tactical |
| Rear/side weak point | Fast ready time after movement | Gap close, escape or distraction | Speed |
| Airborne or distant support | Stable range and accuracy | Turret, projectile or laser reach | Tactical |
| Short Boss opening | High dependable burst | Damage surge or added focused hit | Power |
| Long Seasoned fight | Ink efficiency and repeatable damage | Cooldown, protection and collection utility | Any upgraded Tank |
Weapon rarity cannot rescue a mismatched role. A powerful short-range roll may still be awkward against a Salivator or Stinger, while a modest accurate weapon can make those encounters simple. Keep at least one saved loadout for reach and another for swarm control. Upgrade the weapon you can aim consistently, develop parts that shorten the downtime you actually notice, and change one component at a time after a failed raid. That produces a useful diagnosis instead of an expensive pile of simultaneous guesses.
Boss preparation, farming and common mistakes
Before launching a difficult raid, compare the displayed Salmonid Level with the weapon and Tank you actually plan to equip. Visit Frye's Weapon Stash, scrap rolls you will not use and invest the recovered Spirhalite in a dependable weapon rather than spreading every shard across the inventory. Confirm that each Gadget has a job—crowd clear, access, burst or safety—and that the two jobs are not identical unless the mission genuinely rewards redundancy.
- Ink the exit: connect the objective, a side lane and higher ground before starting a visible encounter.
- Locate the ranged threat: note where a Stinger, Flyfish or Smoker can hide behind the foreground.
- Test one opening: watch a Boss cycle before spending every cooldown.
- Collect deliberately: route through Mega Power Eggs after the danger zone clears.
- Review the failure: decide whether damage, reach, ink, movement or pickup time was the actual shortage.
For farming, start with the material or enemy entry you need, then choose the shortest comfortable unlocked raid that supplies it. Enemy-rich Salmonid Dens can be productive because more targets create more drops, but a theoretically rich stage is inefficient if failures or long recovery repeatedly erase the pace. Repeat a consistent route, record what it yields over several clears, and move up when the current run no longer improves the equipped gear. Our separate farming guide can hold changing route-specific recommendations; this field guide focuses on making the fights repeatable.
The most common mistake is tunnel vision. Players chase a Goldie through a crowd, fire into a Scrapper's front while the rear is inaccessible, or stand inside a Big Shot rhythm to finish one extra burst. The next is pickup panic: the Mega Power Egg remains visible, so it feels as if it must be grabbed immediately. It does not justify crossing a live attack. Finally, do not confuse a favorite weapon with a finished build. If the damage has fallen behind the recommended level, upgrade it, farm with a safer reserve, or lower the current challenge while learning the enemy pattern. Mechanical knowledge and progression are meant to reinforce each other.
Salmonid enemies and bosses FAQ
Where can I review enemies inside the game? Return to the Hideout Ship and open Salmonid Research in the Hoard. New encounters add useful names and notes, making it the best first check when a silhouette in a busy raid was unclear.
Can I fight a Salmonid again? Repeatable raids and their harder variations let you revisit enemy families, although a particular formation can depend on the stage and version selected. Use the dungeon list and needed material as the route selector instead of expecting every enemy in every run.
Does Salmon Run knowledge transfer? Target recognition, ink management and crowd awareness transfer well. Exact counters do not always transfer: Raiders replaces the guaranteed sub-weapon setup with Tanks and Gadgets, and enemies such as Flyfish have adjusted standard-fire solutions. Trust the Raiders animation and hit feedback.
Do all Boss Salmonids drop the same reward? A regular Boss drops a Mega Power Egg, while Seasoned enemies can drop several. Optional Goldies instead matter for Spirhalite Shards. Mission rules and collection safety still determine whether chasing a drop is worthwhile.
Are Boss Salmonids the final bosses? No. Boss Salmonid is a repeatable elite class, while the campaign and post-game have separate named confrontations. This article avoids those identities and story mechanics. When you are ready for full spoilers, use our final boss guide.

Loading comments...