The fastest documented Awlmun Den farm uses Super Spicy difficulty, an upgraded Speed Tank, Flywire, and a Bot Hop ledge skip. Launch-week players have shown clears in roughly 20–35 seconds once the movement is consistent. Treat that number as a community benchmark, not a guaranteed timer: your Tank investment, Gadget parts, route choice, and the final enemy pattern all affect the run.
This guide gives you both the quick route and a safer way to learn it. It also separates repeatable game systems from player-observed reward claims, so you can decide whether Awlmun Den actually solves your current bottleneck.
Progression spoiler warning: the sections below name a later Oftu Island Den, Super Spicy difficulty, advanced Tank upgrades, and repeat rewards. There are no ending or story spoilers.
Awlmun Den farm at a glance
| Farm detail | Recommended setup | Evidence status |
|---|---|---|
| Location | Awlmun Den, Oftu Island | Documented game location |
| Difficulty | Super Spicy | Community route context |
| Tank | Upgraded Speed Tank; often called Ultra Speed Tank after further power-ups | Speed is officially the mobility Tank; this exact build is player tested |
| Core Gadget | Flywire | Player-tested route tool |
| Movement | Bot Hop, second call in the air, then grapple | Bot Hop is a real system; the shortcut is community discovered |
| Optional tools | Jump Bomb, extra jump height, Slow Fall, Dash Bomb, or Blast Boot | Build-dependent player alternatives |
| Main targets | Fast reward rolls, weapons, Gadget parts, and Spirhalite Shards from loot or scrapping | Random results; no fixed rate |
Awlmun Den works as a farm because it compresses a complete reward attempt into a very short movement test. It is not automatically superior for every material. A fast clear can produce a poor roll, while a slower crate route can create more items to inspect or scrap. Think in terms of useful rewards per reliable minute, not the best jackpot shown in a clip.
Before committing resources, compare the mobility tools available to your Tank in the Tank and Gadget Explorer. If your Speed setup lacks the vertical reach shown below, regular progression will be less frustrating than forcing the shortcut early.
Best Awlmun Den farming build
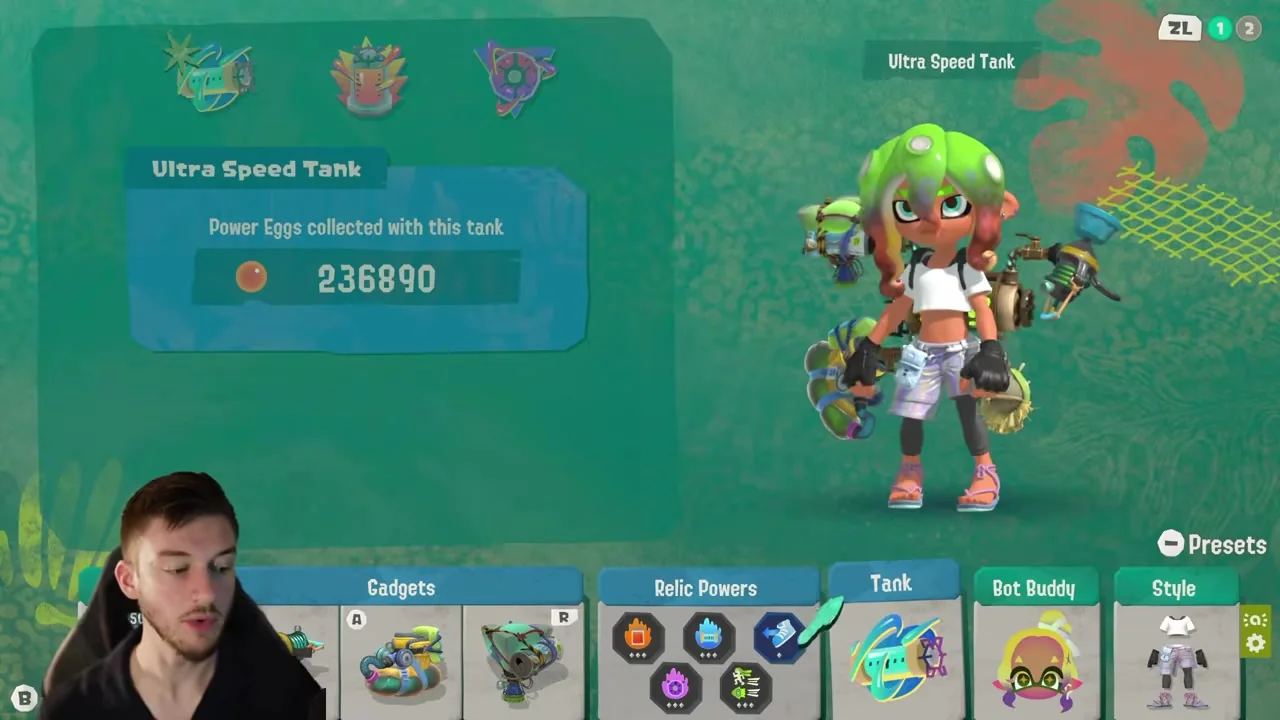
Core setup: Speed Tank, Flywire, and Bot Hop
The Speed Tank is the natural base because its compatible Gadgets are built around mobility. Flywire is the route’s most forgiving tool: it can turn an imperfect Bot Hop into a successful climb by pulling the Mechanic toward the upper area. The Bot Buddy supplies the first launch, while your second call and aerial movement create the height needed to reach the grapple line.
Prioritize consistency before damage. A weapon that clears the required enemies quickly without demanding perfect aim is better for farming than a theoretically stronger option that makes the final seconds erratic. Use a familiar Shooter or another weapon you can fire while correcting your landing. Once ten consecutive runs feel routine, experiment with a faster finisher.
Optional safety and speed tools
Jump Bomb is useful while learning because additional height makes the Bot Hop window less severe. Players have also paired it with a Slow Fall part to preserve altitude. Dash Bomb can convert that height into forward distance, while Blast Boot offers another movement option. These are alternatives, not a shopping list. Equipping every possible movement tool can make the build harder to operate and may leave you without a clean way to finish the enemies at the top.
Choose one failure to solve. If you cannot get high enough, add jump support. If you reach the correct height but fall short horizontally, add a dash or improve Flywire timing. If the climb works but the clear fails, stop changing movement and improve the weapon or finishing Gadget instead.
Fast Awlmun Den route, step by step
Practice the safe approach first
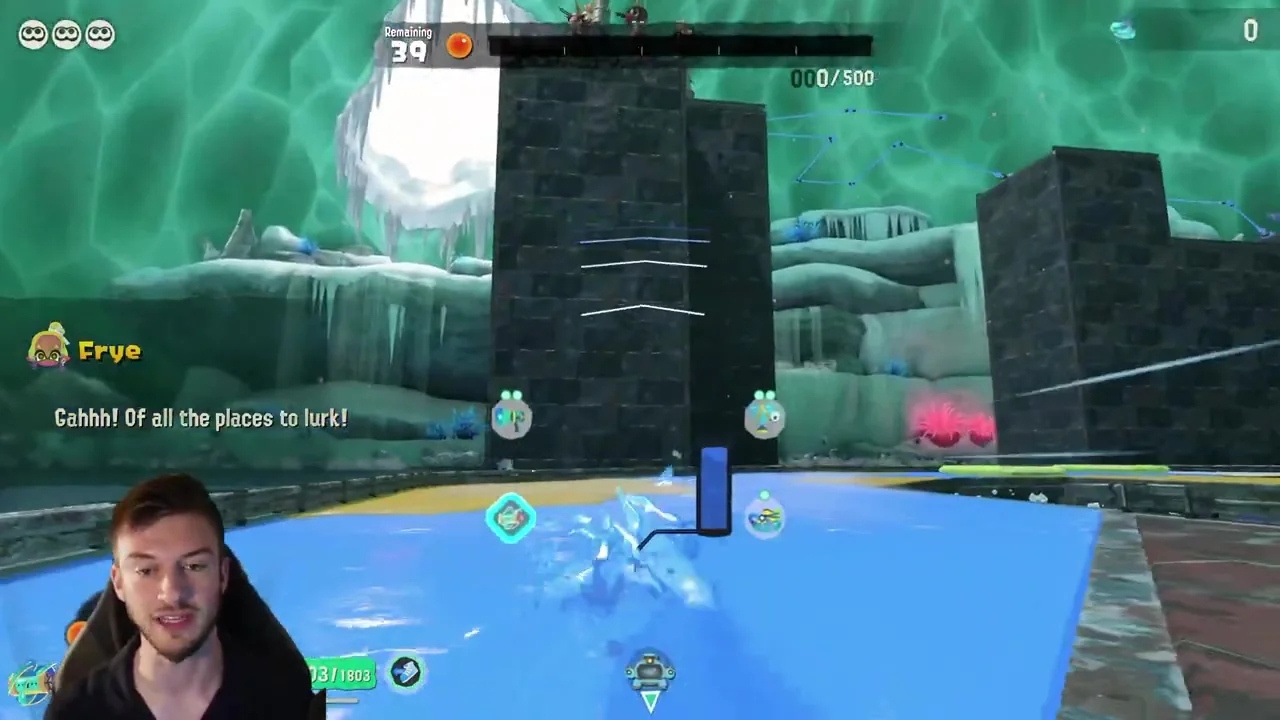
Enter Awlmun Den on Super Spicy and run the opening normally at least once. Note where the lasers stop, which ledge gives you space to call the Bot, where the upper enemies stand, and which surfaces can be recovered with ink. This reconnaissance makes the shortcut readable. Copying a video without knowing the room often turns one missed input into a lost run.
Use your first attempts to establish a baseline. Record the time from gaining control to opening the final reward, then count how often you finish without a fall. A 35-second route that succeeds nine times out of ten produces more attempts than a 22-second route that succeeds half the time.
Execute the Bot Hop ledge skip
- Select Super Spicy and confirm that Speed Tank, Flywire, your preferred jump support, and a dependable weapon are equipped.
- At the start, avoid rushing directly into the laser pattern. Let the opening pressure pass and ink a small recovery patch.
- Move to the community route’s lower ledge. Face the upper area before calling the Bot so the launch is aligned with your destination.
- Call the Bot Buddy onto stable ground. If it arrives at an angle or below the ledge, reset your feet rather than forcing the jump.
- Jump onto the Bot and use Bot Hop for the first burst of height.
- At the top of that arc, call the Bot again if your setup uses the second-call technique. Trigger your jump-height support at the practiced point.
- Aim Flywire at the upper target or reachable surface. Fire while you still have forward momentum; waiting until you are falling makes the pull less forgiving.
- Land facing the required enemies. Ink a safe patch immediately so a hit does not trap you in hostile ink.
- Clear only what blocks completion. Farming is not a full-room elimination challenge unless the objective demands it.
- Claim the reward, return to the map, inspect useful drops, and repeat.
If step six or seven fails, do not continue falling while spending every cooldown. Recover to the inked patch, wait for the Bot and Flywire, and make one clean second attempt. A controlled recovery usually costs less time than a death or restart.
Take or skip the crate detour
The shortest route goes directly to completion. A popular updated variant visits the boxes on the right before finishing. Its author reported that the extra route took about ten seconds and often produced weapons or Gadget parts that could be dismantled for additional value. That reported 80–90% useful-drop feeling was not a measured probability, so do not build your expected income around it.
Use the detour when you want item rolls, weapon material, or parts and can break the boxes without disrupting the climb. Skip it when you are chasing only completion chests, practicing movement, or still losing runs under laser pressure. Test both routes for five clears and write down useful items, not just total Shards.
Awlmun Den rewards: what the farm is actually good for
Current player reports show Awlmun Den being repeated for weapons, Gadget parts, Spirhalite Shards, and items that become more resources when scrapped. Some players have posted 10,000-Shard reward rolls and five-star weapons. These are possible launch-week observations, not guaranteed chest contents or published drop rates. Primo weapons are also random; a short route creates more chances, not certainty.
| Target | Why the Den helps | Main limitation |
|---|---|---|
| Weapons | Many short reward attempts plus optional box drops | Class, level, stars, Powers, and Primo status are random |
| Gadget parts | Route and crate drops can add repeatable part rolls | A Speed-focused route may not match every Tank build |
| Spirhalite Shards | Direct rolls plus value from scrapping unwanted loot | Jackpot results distort small samples |
| Spirhalite Gems | Occasional community reports exist | No dependable repeat rate has been verified |
Inspect before scrapping. A lower headline level can still carry a useful combination of Weapon Powers, and a new Primo deserves comparison with the version already in your inventory. Clearing faster is pointless if the post-run routine destroys the item you were trying to find.
Is Awlmun Den the best farm?
It is one of the strongest launch-week choices for rapid mixed-loot rolls after you can execute the route. It is not the universal answer. Huge Crystal stages are easier to understand when you need steady Shards: defeat Salmonids, collect Power Eggs to raise Yield, and drill after reaching the target multiplier. A targeted enemy route can be better for a specific construction material. Co-op Help and high-level raids are being tested for Gems, but current reports remain inconsistent.
- Choose Awlmun Den for short weapon, part, and scrap-value attempts.
- Choose Huge Crystal stages for a deliberate, repeatable Shard session.
- Choose a known enemy/stage when one named Salmonid material is blocking construction.
- Do not use Awlmun as a guaranteed Gem route.
For a resource-by-resource comparison, use the complete Splatoon Raiders farming guide. It covers Shards, Gems, XP, Power Eggs, weapons, and when to change farms as progression opens new activities.
Troubleshooting the Awlmun Den skip
| Problem | Likely cause | Practical fix |
|---|---|---|
| Bot Hop launches sideways | Bot is not square to the ledge | Recall on flat ground and face the destination before jumping |
| Flywire cannot reach | Grapple fired after losing height | Fire near the top of the jump and add one height tool |
| You reach the top but die | No safe ink or slow enemy clear | Ink on landing and use a consistent crowd-clearing weapon |
| Crate route ruins the clear | Detour is being forced before the base route is stable | Skip boxes until direct clears are repeatable |
| Runs exceed a minute | Too many optional actions | Remove one detour or switch to the intended route |
If the same movement suddenly fails after a game update, assume the route may have changed before blaming your inputs. Check current game notices and recent gameplay evidence. Community shortcuts depend on collision and movement behavior that Nintendo has not promised to preserve.
Awlmun Den farming FAQ
When should I start farming Awlmun Den?
Start after you have unlocked the location, Super Spicy for the relevant route, and enough Speed Tank investment to reach the upper path consistently. Before that, normal raids give progression, materials, and practice without requiring a narrow shortcut.
Do I need the exact “Ultra Speed Tank” build?
No single published build is mandatory, but the fast route needs sufficient vertical and forward movement. Flywire plus Bot Hop is the clearest documented core. Add only the support needed to solve your failed jump.
Does Awlmun Den guarantee a five-star or Primo weapon?
No. Harder activities can produce stronger equipment, but star tier and Primo rolls remain random. The farm’s advantage is the number of attempts you can complete, not a guaranteed weapon.
Can I farm 10,000 Shards every run?
No. The 10,000-Shard chest is a reported jackpot result. Include dry and ordinary runs when estimating your personal Shards per minute.
Is the route safe from patches?
No. Bot Hop is an intended mechanic, but this particular ledge skip is a community route documented during launch week. Recheck it after patches that affect movement, Gadgets, enemy placement, or rewards.
Best practice: build for consistency, complete five direct clears, test five crate-detour clears, and compare useful rewards. That small log tells you more about your real farm than someone else’s best clip.
Loading comments...